In lesson 2 I forgot to mention one final step – creating a snapshot. At the end of every lesson, I suggest you create a snapshot of your virtual machine so that in case anything goes wrong, you can restore it. The reason I bring this up is because it happened to me while I was writing the last lesson. After I compiled gcc, my virtual machine died. It would boot and then black screen on me, so instead of fighting trying to fix it, I just restored my snapshot. I had to recompile the toolchain, but it was less time wasted than recreating the whole virtual machine had I not created that snapshot.
Step 1: Introducing the GNU toolchain
In the last lesson we went through the motions of compiling and installing the GNU toolchain. Now we will take a quick look at what is in there. Open up a console and go the ‘bin’ directory in the toolchain installation:
cd /opt/msp430-toolchain/bin
ls -l
These are the binaries provided by the installation. I will give a brief overview of the commonly used utilities and how they might be used, most of which is paraphrased from the man pages. If you want more information you can get all the details from there [note you must strip off the program prefix part i.e. ‘msp430-’, to view the man page]:
- addr2line: get the filename and line number for a given address in an object file. Used for debugging.
- ar: utility to create, modify or extract archives. Archives are typically used as code libraries. If you every see a file called libxxx.a, that is a library. It is a convenient way to store binary objects and link against them later. For example, say you were going to create a library for parsing serial input, you could compile it and archive it as libserial.a. Then when you want to use one of the functions from the library, link against it using -L <library directory> -lserial. A public header file is also required by the calling code, otherwise the library functions have to be extern’d.
- as: the assembler. Creates machine code (object files) from assembly. Called automatically by the compiler, but can be invoked manually on an assembly file.
- cpp: the C preprocessor. Invoked automatically by the compiler as the first step and is responsible for expanding all the macros, including all the header files, etc…
- gcc: the compiler. Takes C code as an input and compiles it into machine code with the help of the C preprocessor and assembler.
- gcov/gprof: these two utilities typically go hand in hand. They stand for GNU coverage and GNU profiling. Used for analyzing and optimizing code.
- gdb: the GNU debugger. Command line only (GUI front-ends available).
- ld: the linker creates an executable from one or more object files.
- nm: lists the symbols in an object file.
- objdump: a utility to inspect the binary content of object files. This tool can be used to view the disassembled output of the compiled code.
- objcopy: this tool is used to copy and translate files from one format to another. The object file itself cannot be programmed to the target because it contains additional information that the machine itself cannot interpret. This tool is often used to convert object files to binary so they can be programmed to flash.
- ranlib is the same as ar, except it generates an index which speeds up linking.
- readelf: Displays the contents of an ELF file. An ELF file is a type of object file commonly used by gcc and other compilers. The ELF file contains headers which define the code structure, separating the compiled object into sections which represent different types of code.
- size: lists the section sizes in an object file.
- strings: prints the printable characters in a file.
- strip: strips symbols from an object file. Specific flags can be used to retain some symbols.
In this lesson we will only be using gcc. When called on its own with default arguments, gcc actually invokes the C preprocessor, assembler and linker all in one. The output is an executable. By using additional flags, the compiler can be instructed to stop at any one of these steps.
Step 2: Choosing an IDE
Before we jump into the code, we should spend a bit of time talking about editors. If you already have a preferred editor, you can probably skip to the next step. There are many options for editing code and I will point out a few of the most popular ones. I personally use vim – which is a command line based editor. I like it because it is fast and has all the features I need. I have customized my installed with additional programs, plugins and hot-keys so I can quickly navigate code. I will tell you now, vim is not for everyone. It takes some time to learn. If you are interested in using vim, I can provide you with my setup and configuration. Also, in the category of command line editors and a fierce competitor to vim is emacs. GUI front-ends exist for both vim and emacs.
For simple text editors, gedit is quite popular and is the default text editor on some Ubuntu distros. It has an easy to use tabbed interface and it is lightweight. There are also plugins available which can add most IDE functionality.
In the full-blown IDE category, the most popular is Eclipse. Eclipse is a Java based IDE which runs on Linux, Mac and Windows. It has all the features built right in and there are tons of additional plugins available. Because of the plugin support, Eclipse has become the go-to IDE for most semiconductor manufacturers to use as a foundation for their customized IDE environment. Texas Instruments’ Code Composer Studio and Freescale’s Code Warrior are prime examples. The downside to using an IDE like Eclipse is that it takes a lot of resources to run and in a virtual machine you may experience sluggishness. I would recommend increasing the amount of memory allocated to your virtual machine to at least 2GB. There are other popular IDEs such as Geany and Netbeans.
If you do not yet have an IDE of choice, I suggest you try out a few of these and see which one speaks to you.
Step 3: Setting up the MSP430 Launchpad
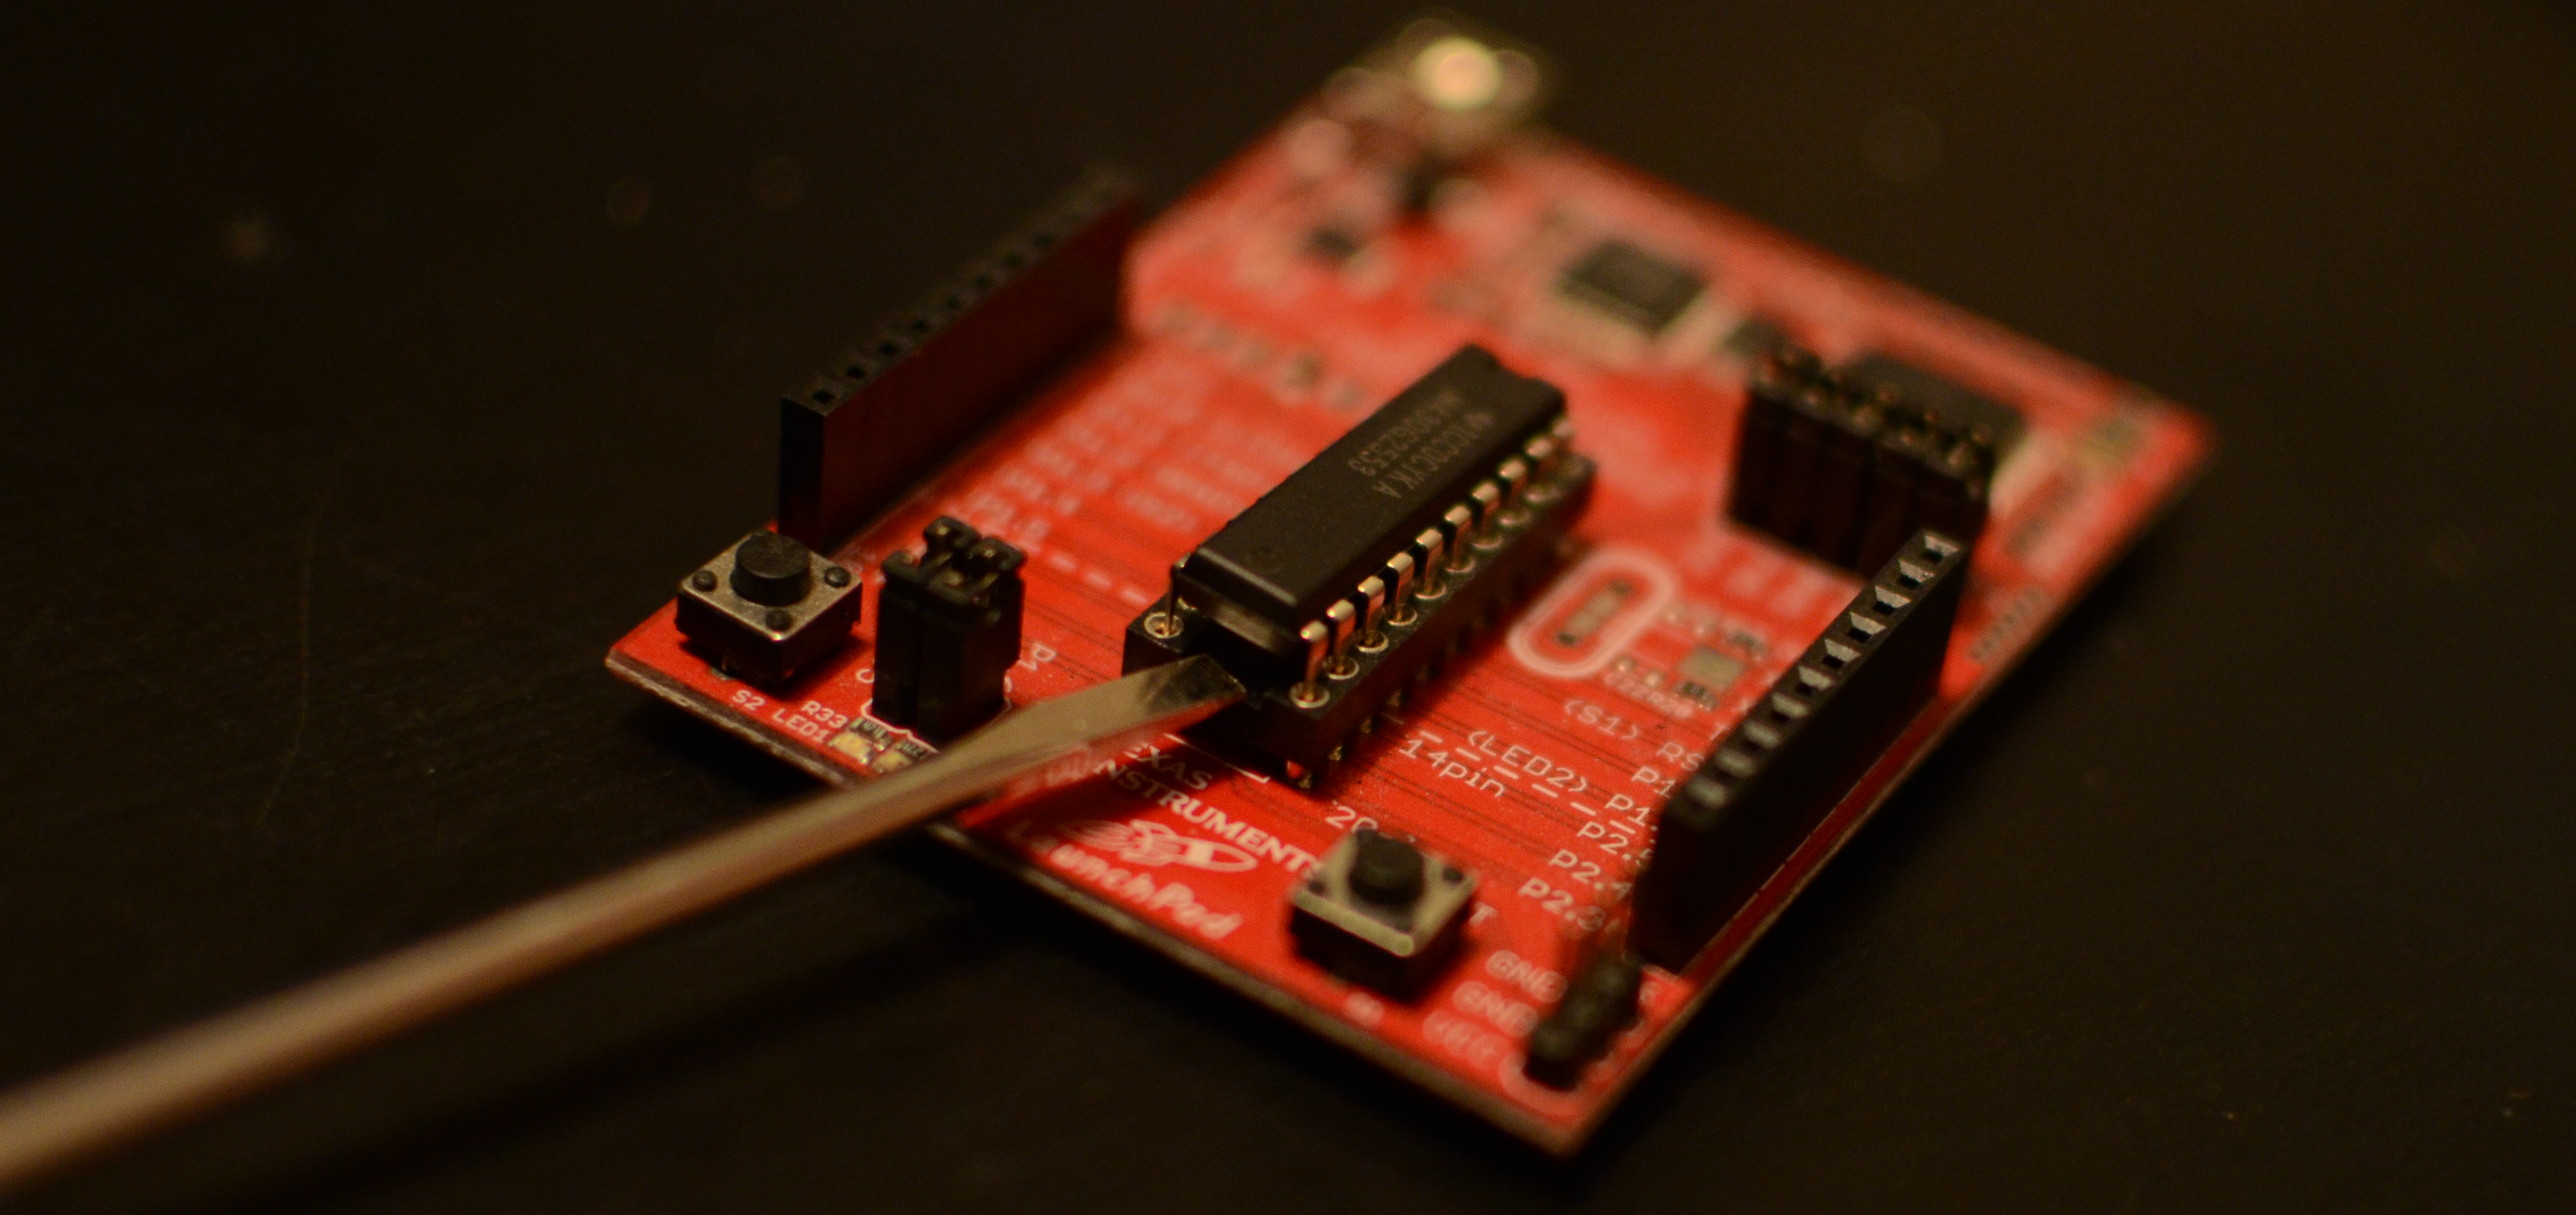
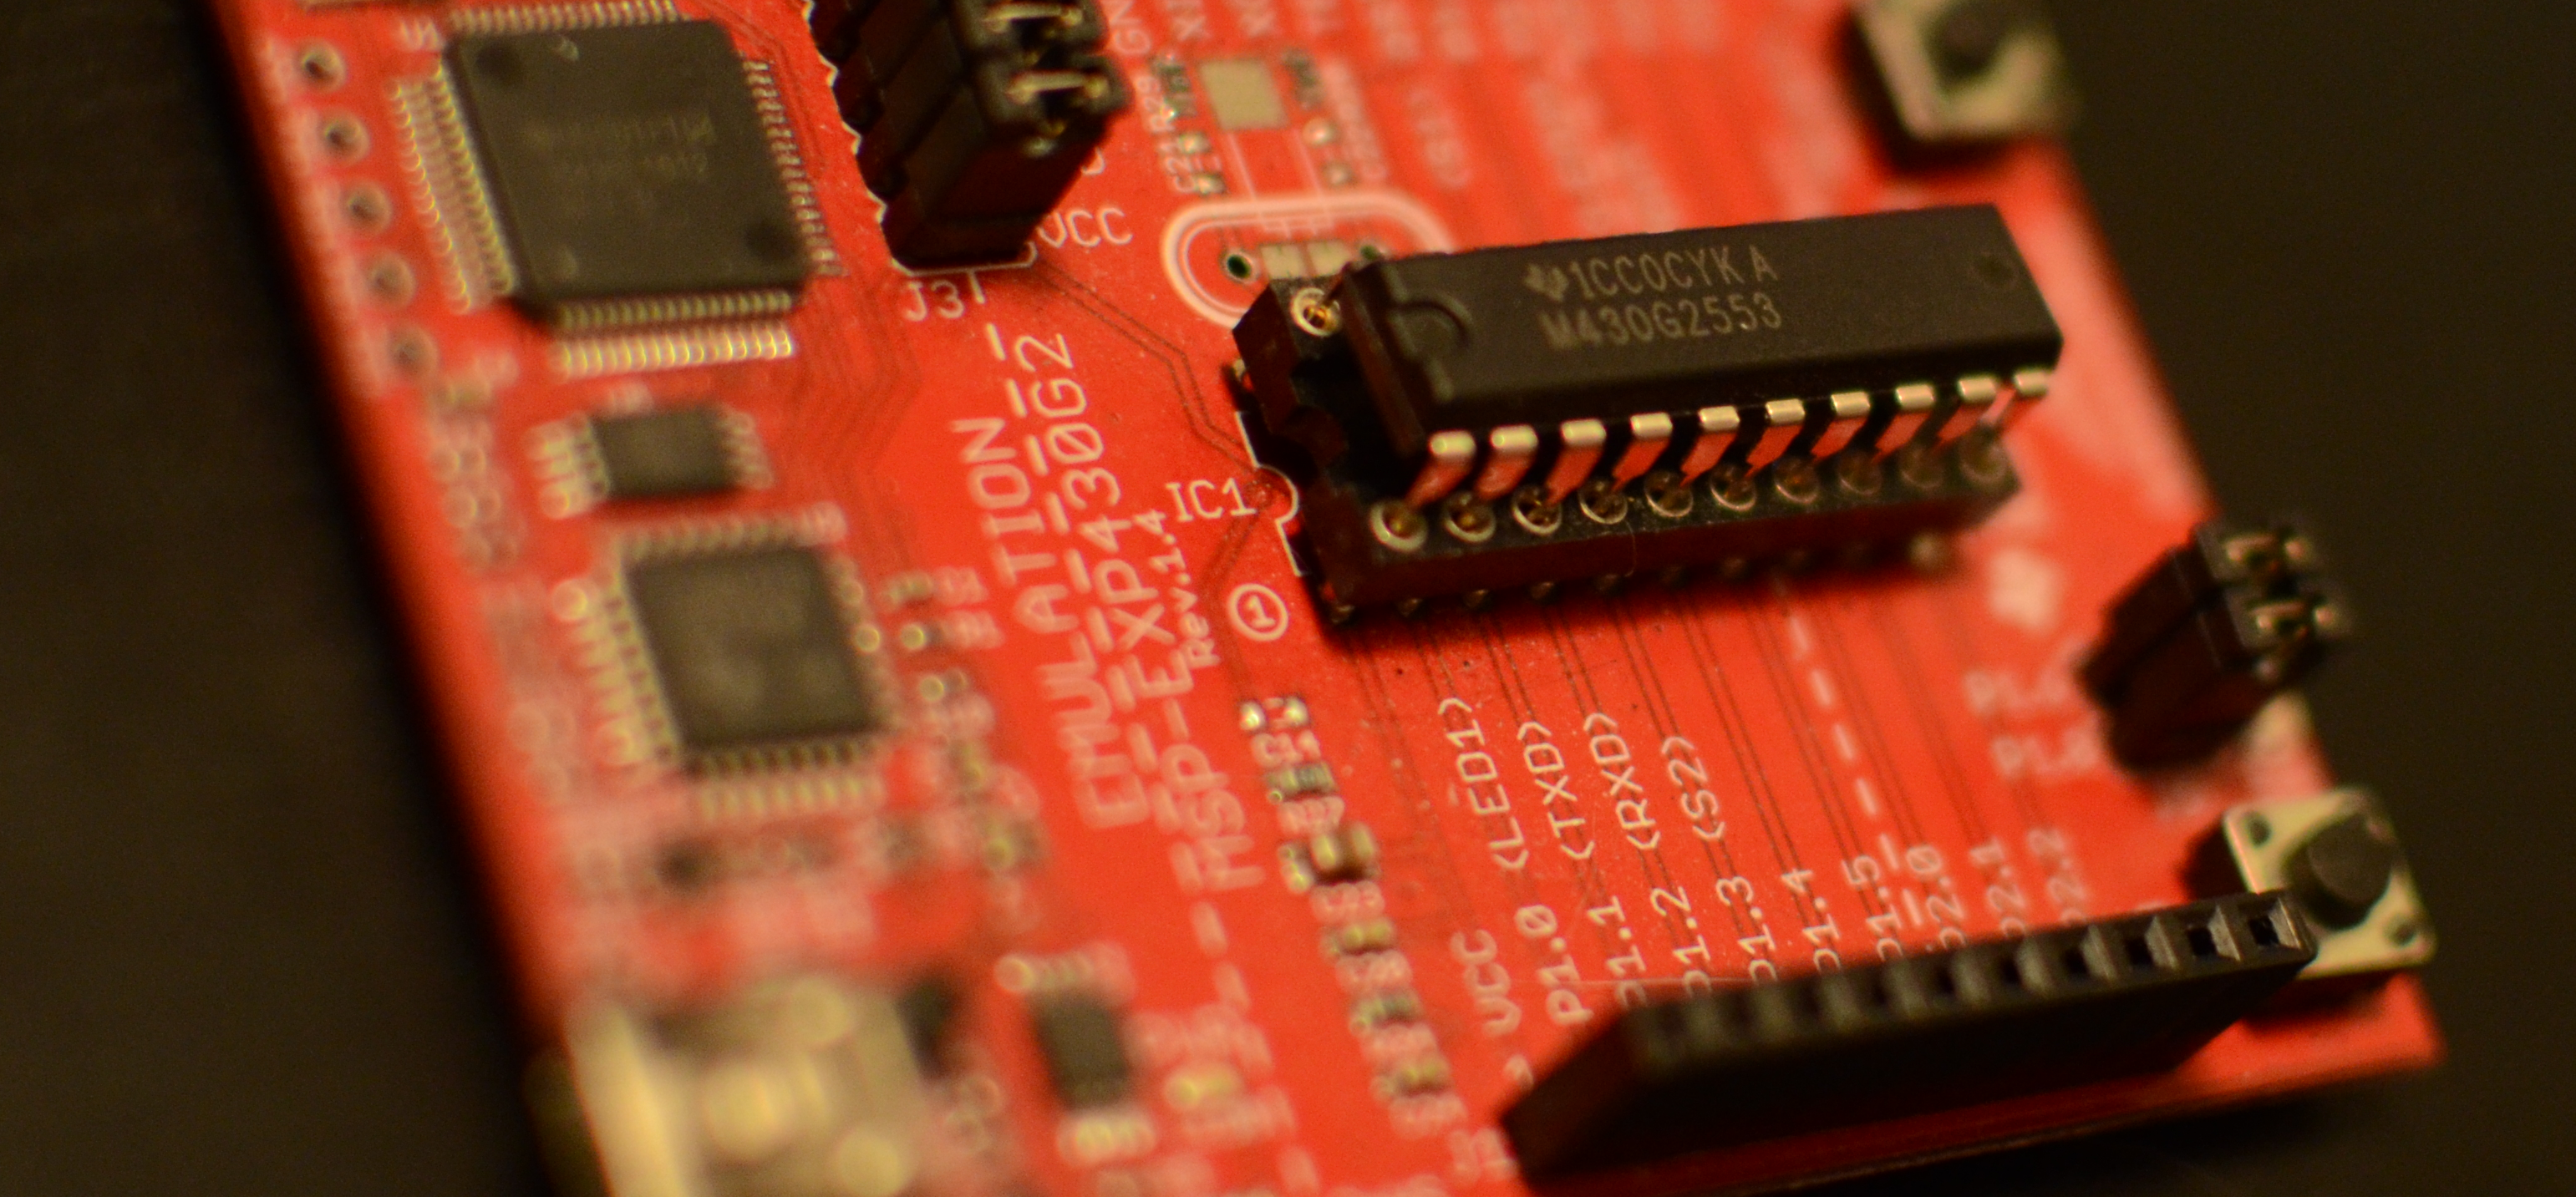
The MSP430 launchpad comes with two microcontrollers, one of which is the MSP430G2553 (Note: [Bob] has informed me that the rev 1.3 and older Launchpads do not come with this device, so you will have to purchase it separately from TI if you have an older board). This is the device we will be using for our tutorials. If the alternate device is already installed, you must carefully remove it by prying slowly on each side with a screwdriver. If you pull it up from only one side, you will bend or break the pins. When installing the MSP430G2553 in the socket, the notch must be facing up towards the top of the device. The pins may also not align exactly (they may be too wide for the socket). In this case, place the chip on the socket so that one row of pins is just lightly seated in the socket. Gently push in the pins on the other side using the screwdriver until they line up and then push the chip down completely into the socket. Don’t try and force the chip into the socket.
Removing the chip by prying at each side with a flat-head until it comes off
Installing the chip – notch pointing upwards and the chip seated lightly so the pins can be aligned
It is also important to keep electrostatic discharge (ESD / aka a shock) in mind when you are handling your Launchpad. Damage caused by ESD can leave you scratching your head because one second everything works and the next some part of it may not. Make sure to discharge any static electricity on something metal that is properly grounded before you touch the launchpad. Alternatively, you can buy an antistatic mat or wristband.
There are two very important documents which you should read through and will be required as reference. The first is the MSP430x2xx Family User Guide which describes all the features that the family supports. A family is a set of chips that share a similar set of registers, memory map and peripherals. Each device may vary by the number of pins available and therefore may have more instances of some peripherals. Sometimes devices in the same family may be pin compatible – assuming they are the same package. There will also likely be differences in the amount of memory available.
The second document is the MSP430G2x53/13 Datasheet. This document describes all the specifics of the device such as the exact sizes of memory, pin descriptions for the different packages and the electrical characteristics. Use the datasheet to find device specific information (such as which pin to use for I2c), and use family reference manual for functional descriptions. There is a lot of overlap between the two, so its best to cross-reference to have the best understanding of your device.
The memory map of the specific device is crucial to embedded programming. A memory map the really just the organization of multiple memory devices connected to a microcontroller. The memory devices may be internal or external. In the case of the MSP430, all the memory devices are internal. Each type of memory has its own properties, advantages and disadvantages. It may be volatile (loose power, loose the contents) or non-volatile (the contents are retained without power). There are also varying speeds which play an important role in choosing which memory to use in what application. These are some of the types of memory most commonly used for most microcontroller based embedded systems:
- Registers: extremely fast memory, built into the microcontroller. Used for configuration and operation of the device and peripherals. Registers maintain the context of the running code, such as the program counter, stack pointer etc.. Registers are volatile memory.
- RAM/SRAM: very fast memory which can be internal or external to the device. There are many types of RAM used for different purposes but there is always some built into the device (typically SRAM). Any variable that needs to be modified during execution will be placed in RAM because it is fast to read and write. Sometimes code is run from RAM depending on the amount in the device and specific implementation.
- Flash: There are many types of flash, some internal, others external using a variety of interfaces. Internal flash is where the program is stored. In the case of the MSP430, the code is executed from flash as well. This is called execute-in-place and is a feature of some types of flash. This means the code can be run directly from flash rather than copying to RAM/SRAM first. Flash is non-volatile, so the memory contents will be retained across a power cycle. Obviously this is required for storing the program. You cannot write flash directly. A flash controller is required to program the flash (there is one built into the MSP430). Also, flash must be erased in blocks called sectors before it can be programmed. When it is erased, all the bits are set to ‘1’. You can clear a bit to ‘0’, but you can not set a bit to ‘1’ without erasing the sector.
It would be great if all the code could run in SRAM because it is extremely fast. But it is also very expensive, so using it as your desktop’s main memory instead of DDR would make it unaffordable. That’s why in the latest desktop processors, the L2 cache (which is SRAM) comes in 6MB or 8MB, orders of magnitude less than the amount of DDR RAM required. As technologies mature, we are seeing some very fast memory come down in price, while some of the emerging memory technology makes the current technology obsolete but at a very high price. Now that you understand what each of these are, let’s take a look at the memory map of the MSP430G2553.
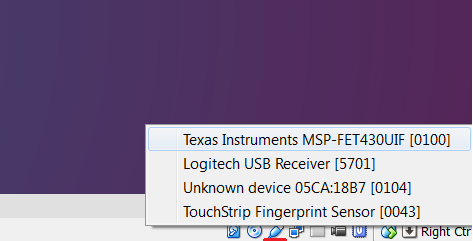
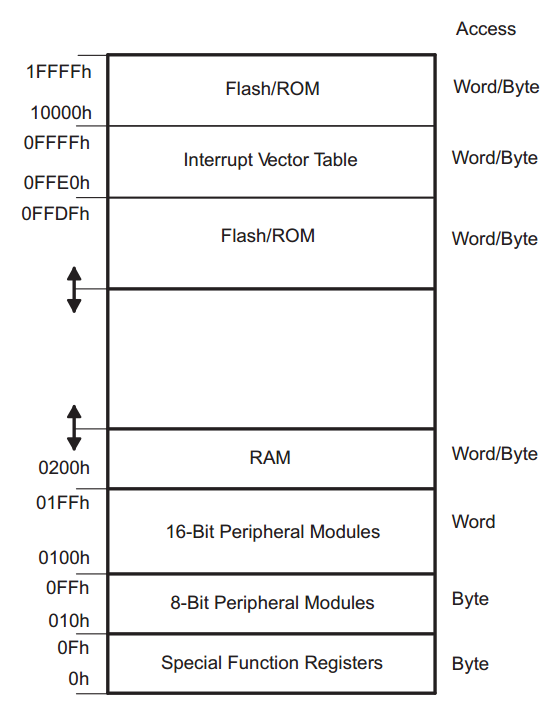
Illustration from MSP430x2xx Family User Guide, SLAU144
This illustration is the memory map defined for the family of devices. Starting from address 0h to 1FFh, all the registers in the device are mapped. There are three types of registers defined:
- 8-bit special function registers (SFRs)
- 8-bit peripheral registers
- 16-bit peripheral registers.
I will not go into detail about all the registers now because that would be pointless without using examples. We will instead learn about each one as required.
The next section of memory starting at 200h is the RAM (SRAM), specifically in the case of the MSP430G2553. The arrows on the left indicate that the top of RAM and bottom of flash can vary for each device. The top of flash is fixed at FFFFh, which includes the interrupt vector table. We will discuss interrupt vectors in another lesson; for now think of it as a table of functions stored in flash that the hardware can call to notify the software of an event. The very top of flash starting at 10000h is for some devices which have an extended addressing scheme called MSP430X which enables addresses greater than 16 bits. The MSP430G2553 is not one of these, so for us flash boundary ends at FFFFh.
If you take a look at the datasheet, table 8 shows the breakdown of the device specific memory organization. The MSP430G2553 has 16KB of flash and 512 bytes of RAM, so the RAM region ends at 3FFh and the flash starts at C000h. The information memory is a section of flash that is used to store device specific configuration parameters. We will use some of these in the next lesson to set up the clocking of the device.
Step 4: Getting the code
Git is the source code management tool (SCM) we will be using. It is one of the most popular in the open source community. I will be using git exclusively from the the command line. If you are not familiar with git I suggest you read through these two tutorials from git-scm and udemy. There are GUI front ends, but from my experience they do not do a great job. In my opinion, the command line is best and it is not difficult to learn. Git is not installed by default in Lubuntu, so let’s install it:
sudo apt-get install git
Once git is installed, you should set your username and email. This is used to track commits, so if you are working in a collaborative environment, you would be able to see who made what changes.
git config --global user.name “YOUR NAME”
git config --global user.email “YOUR_NAME@DOMAIN.COM”
Ok now we are ready to get the source code. The git repository is hosted on github. When you create a repository on github it is assigned a URL which can be used to obtain a copy of the repository using the git clone command.
cd
git clone https://github.com/simplyembedded/msp430_launchpad.git
The cloned repository will now be available in the directory called msp430_launchpad. Navigate into this directory. By default a cloned repository will be on the master branch. I will use tags to define lesson content. Tags are like a pointer to a commit on a branch. If you checkout a tag, you should create a new branch based off it before making modifications. Since this is lesson 3, I have created a tag called ‘lesson_3’. To view all the tags and create a branch off of this tag, use the following commands:
git tag
git checkout -b lesson_3_devel lesson_3
You will now be on your new branch called ‘lesson_3_devel’, which is based on the tag ‘lesson_3’. You can verify that you are on the correct branch by running
git status
You should now see two files, README and main.c. Open up main.c in your editor of choice and navigate down past the file header comments. The first piece of code you will see is the include of msp430.h. This file is the generic header file for all the MSP430 devices. If you look at msp430.h, which is located in /opt/msp430-toolchain/msp430-none-elf/include, you can see that the file uses hash defines to determine which device specific header file to include. This is useful because it offers the flexibility of compiling the same code for a different device by changing only the compile flag (details are in the next step). The device specific header file defines all the registers, their offsets and bitfield definitions. To see what is available for this device, take a look at ./msp430-none-elf/include/msp430g2553.h. Throughout the tutorials I will be referencing this contents of this file as we use them in the code.
The first example using the definitions in this header file is the first line of code in the main function (back in main.c). The MSP430 has a watchdog timer, which is basically hardware clock that can reset the board if it is not ‘pet’ periodically. Petting the watchdog typically means writing some value into a register. We will talk about the watchdog, how to configure it, and how it is used in a later lesson. For now it will be held back – or disabled – so the device doesn’t constantly reset. To do so we use the watchdog control register, defined as WDTCTL in msp430g2553.h, and set the appropriate bits, WDTPW – the watchdog password – and WDTHOLD – the bit to hold the watchdog. Note that the register and bit names in the header file match those in the family reference manual.
In order to illuminate LED1 on the board, we need to know which pin it is connected to. Luckily, TI has provided that information directly on the board, so no schematic surfing required just yet.

The LED is connected to P1.0 where ‘P1’ means the pin is on port 1 of the device, and the ‘0’ defines which pin within the port. A port is a grouping of pins on the device. They are grouped to make accessing them manageable through register access. The next line of code uses the port direction register to set the pin direction to an output:
/* Set P1.0 direction to output */
P1DIR |= 0x01;
If you are are unfamiliar with bitwise operations in C, you should stop now and learn them. This code sets bit 0 of the P1DIR register which configures pin P1.0 as an output. Why bit 0 you ask? Because the pin number within the port is directly correlated to the bit in the each of the pin configuration registers.
This applies to all the pin configuration registers for all ports. Therefore, the output of the pin can be set to either high or low using the P1OUT register by setting or clearing bit 0 respectively.
/* Set P1.0 output high */
P1OUT |= 0x01;
This is by no means a complete explanation of the pin configuration for the MSP430. There is much more functionality which will be explained in depth in the next lesson. For now, this will be sufficient to turn on the LED. To make the LED blink we can toggle the pin output using the following code.
while (1) {
    /* Wait for 200000 cycles */
    __delay_cycles(200000);
    /* Toggle P1.0 output */
    P1OUT ^= 0x01;
}
This infinite while loop uses the __delay_cycles function to wait 200000 cycles between each LED toggle. This function is an intrinsic gcc function, meaning that it is built in the compiler. To toggle the LED output, the exclusive-or operator is used.
Step 5: Running the code
Finally let us compile and run the code! Start by using the following command to compile using gcc.
/opt/msp430-toolchain/bin/msp430-gcc -mmcu=msp430g2553 main.c
The the ‘mmcu’ flag tells the compiler which microcontroller to compile for. When compiled with –mmcu=msp430g2553, the compiler will, amongst other things, define __MSP430G2553__ (i. e. #define __MSP430G2553__ in code) . Recall from the previous section, this define is used to determine which header file should be used. Once the code is compiled, there will be a new file called a.out. The name of the file ‘a.out’ is the default gcc output filename if one is not specified.
Next the file can be downloaded to the target. There are a few tools which can be used to download the code to the target. The first is gdb, which is the standard in the open source community for debugging. GDB can run standalone if you are debugging on your host machine. However, if you are debugging on a target, there needs to be an additional interface available. This is sometimes implemented as a utility called gdbserver, which creates a TCP/IP connection that gdb can connect to. Manufacturers of some JTAG (diagnostics interface) tools make their own gdbserver for their tools. GDB is extremely powerful and very mature, but can be a bit difficult to set up and learn. For this reason, I will start off with the second option, mspdebug. This utility is an open source project created specifically for programming and debugging the MSP430s. It is very simple to use and is available for download in the Ubuntu repositories, so let’s install this utility.
sudo apt-get install mspdebug
Now, connect the USB cable to the MSP430 Launchpad and to your computer. Your host machine may or may not recognize the interface, but either way it should be available to attach to your virtual machine (NOTE: [Bob] has brought to my attention that if you are running a Linux host, you must add yourself to the vboxusers group in order to access USB devices in VirtualBox, instructions are available here).
Mspdebug supports a number of drivers to accommodate various hardware interfaces. In the case of the MSP430 Launchpad, we must use the ‘rf2500’ driver. To start mspdebug with this driver, use the following command:
mspdebug rf2500
You should see the program connecting to the device. Once it is connected, program a.out to the device.
prog a.out
This what should happen:
![]()
Each section of code has been written to the device flash (remember from above flash is from C000h to FFFFh). Now you can run the program by typing ‘run’ into mspdebug. The red LED on the board will start flashing. To stop the program use CTRL-C. To reset the board, use the ‘reset’ command.
And that’s all for today. Don’t forget to take a snapshot of your vm. In the next lesson we will build on this code to learn how to configure the clocks and pins of the MSP430.
All steps are very well explained. Best regards!
Thanks Lucian!
This did not work for me. I’m using OSX Mavericks. When I try to access this from the VirtualBox by clicking on the usb logo on the bottom right of the window, it appears as one of the selections but it is not clickable.
Hi Abdul,
Another member has the same problem with OSX as well. Have you looked at this site http://processors.wiki.ti.com/index.php/MSP430_LaunchPad_Mac_OS_X? At the bottom of the page they mention a USB driver for evaluation. You can also check out the TI E2E forums for the MSP430.
I managed to get a derivative of this going on OSX V10.9.5
Follow the blog instructions to generate a.out then jump out of Lubuntu and program the micro using mspdebug. This does require you to set up your serial port as described here…
https://github.com/colossaldynamics/ez430rf2500
You then need to set up mspdebug on OSX as described here…
http://processors.wiki.ti.com/index.php/MSP430_LaunchPad_Mac_OS_X#Installing_mspdebug_manually_on_top_of_MacPorts
Note I still do not have access to the serial port in Lubuntu after following these instructions.
Good Luck
Very well written, thanks.
Thank you Joel!
I agree with Joel, thanks Chris!!
I have progressed to Lesson 3 OK. After git status I see we have a README and a main.c file. It’s probably a stupid question but how do I open main.c in my editor of choice?
Hi guys ! I’m the new in the field. Finally, I’ve been able to build and debug on terminal. The things is now I want to build code on Eclipse. Could you guys give me an advice ?. Tks all
Hi Toan,
I haven’t used Eclipse in a while, but there is an option to make a new project using an existing makefile. I believe it is called “Makefile project with existing code” under the C/C++ projects. Then you will have to modify the compiler and debugging settings to point to the msp430 gcc. This link is for the CCS wiki.
http://processors.wiki.ti.com/index.php/Using_MSP430-GCC_with_CCSv6
It won’t be exactly the same but it should help you with some of the options you will need to configure.
Hi, thanks for these tutorials.
I have tried vim under Windows a couple of time but always run in to issues with code completion. So this could be a great opportunity to start using it. I would appreciate it if you could share your setup with me.
Thanks
Hi Steven,
I have never tried to run vim under Windows, so I am not sure that all of the my plugins will work. I will send you my vim configuration via email, however you need ctags and cscope. Ctags is available for Windows (http://ctags.sourceforge.net/) but I do not see cscope having any support. The auto-completion plugin I use, onmicppcomplete, only requires ctags, so you might be ok. But I would really suggest trying vim out under linux, it is much more fun 🙂
I realize this tutorial (and a very good one, btw!) is targeting the MSP430G5523, but the compile should work for any target defined in the distribution. However, if I compile for the MSP430FR5969 device (or any other “F” type I’ve tried), the linker script (.ld) file is not found even though it exists in the same directory where ld found the msp430g5523.ld file by default:
$ /opt/msp430-toolchain/bin/msp430-gcc -mmcu=msp430fr5969 main.c
/opt/msp430-toolchain/lib/gcc/msp430-none-elf/4.9.1/../../../../msp430-none-elf/bin/ld: cannot open linker script file msp430fr5969.ld: No such file or directory
collect2: error: ld returned 1 exit status
$
If I use the -T option to provide the full path to the file, it works, no complaints:
$ /opt/msp430-toolchain/bin/msp430-gcc -mmcu=msp430fr5969 -T /opt/msp430-toolchain/msp430-none-elf/lib/430/msp430fr5969.ld main.c
$
I confirmed that the msp430g5523.ld file is required, and is found by default because renaming it results in the same error:
$ /opt/msp430-toolchain/bin/msp430-gcc -mmcu=msp430g2553 main.c
/opt/msp430-toolchain/lib/gcc/msp430-none-elf/4.9.1/../../../../msp430-none-elf/bin/ld: cannot open linker script file msp430g2553.ld: No such file or directory
collect2: error: ld returned 1 exit status
$
I’m baffled by this, but at least I know how to work around it. Any ideas why some linker script files are found by default and some aren’t? I appears it’s looking for the right filename, but possibly in a different (wrong) default directory. Am I missing something or is this a msp430-gcc bug?
Hi Lou. That’s an interesting find. It seems to be a compiler bug. If you pass gcc the -v option, you can see which options are being passed to the linker and it looks like the defaults are not including the correct directories when using the mmcu switch for that device. I can reproduce this on my end and if you use the MSP430G2553 they are as expected, but with the MSP430FR5969, they are not. Are you using the latest compiler? If so it should be reported to TI on the E2E forums.
Hi
I followed all the instructions but it keeps telling me:
main.c:38:20: fatal error: msp430.h: No such file or directory
compilation terminated.
when I typed:
/opt/msp430-toolchain/bin/msp430-gcc -mmcu=msp430g2553 main.c
Hi Khoa. Which version of msp430-gcc are you using? Did you compile it from source as per the instructions in the previous tutorial? Can you make sure that you successfully copied the header and linker files to the correct location in the toolchain root directory. If you go in /opt/msp430-toolchain and run the command ‘find . -name msp430.h’, what do you get? If it finds the file, could you please show me the permissions set for the file (ls -al). Cheers.
Great tutorial, all steps and tools are well explained at the right depth. Thank you for taking your time in doing these tutorials, I am sure going to enjoy them.
Best
Jesus
Thanks Jesus! Glad to hear you are finding them helpful. Cheers!
Very useful information and great tutorial, all well explained, thanks Chris!
Greetings from Guanajuato, México!
Thanks for the great feedback Raul!
Such an incredible article. Congrats on your great work.
I would like to add that I used centos 7.0 and this is how I installed mspdebug from source:
git clone https://github.com/dlbeer/mspdebug
cd mspdebug
make
make install
If compilation fails by complaining that usb.h can’t be found, you need to install the usb development headers and sources by:
yum install libusb-devel
then do again:
make
make install
I’m getting the following error when using the command: /opt/msp430-toolchain/bin/msp430-gcc -mmcu=msp430g2553 main.c
I’m using the latest versions of the source files and support files. I’m stuck! Please help!
main.c:1:0: warning: devices.csv not found on any include paths.
Please obtain the latest version of the msp430-gcc-support-files archive from:
“http://software-dl.ti.com/msp430/msp430_public_sw/mcu/msp430/MSPGCC/latest/index_FDS.html”
and place the full path to the “include” directory containing devices.csv on an include path specified with -I
Defaulting to the hard-coded device data…
/**
/opt/msp430-toolchain/lib/gcc/msp430-none-elf/6.4.0/../../../../msp430-none-elf/bin/ld: cannot open linker script file msp430g2553.ld: No such file or directory
collect2: error: ld returned 1 exit status
I copied the devices.csv file into the /opt/msp430-toolchain/msp430-none-elf/include/ and ran the command below.
/opt/msp430-toolchain/bin/msp430-gcc -mmcu=msp430g2553 -I /opt/msp430-toolchain/msp430-none-elf/include/ main.c
Now I’m getting these errors:
/opt/msp430-toolchain/lib/gcc/msp430-none-elf/6.4.0/../../../../msp430-none-elf/bin/ld: cannot find crt0.o: No such file or directory
/opt/msp430-toolchain/lib/gcc/msp430-none-elf/6.4.0/../../../../msp430-none-elf/bin/ld: cannot find crtbegin.o: No such file or directory
/opt/msp430-toolchain/lib/gcc/msp430-none-elf/6.4.0/../../../../msp430-none-elf/bin/ld: cannot find -lgcc
/opt/msp430-toolchain/lib/gcc/msp430-none-elf/6.4.0/../../../../msp430-none-elf/bin/ld: cannot find -lmul_none
/opt/msp430-toolchain/lib/gcc/msp430-none-elf/6.4.0/../../../../msp430-none-elf/bin/ld: cannot find -lc
/opt/msp430-toolchain/lib/gcc/msp430-none-elf/6.4.0/../../../../msp430-none-elf/bin/ld: cannot find -lgcc
/opt/msp430-toolchain/lib/gcc/msp430-none-elf/6.4.0/../../../../msp430-none-elf/bin/ld: cannot find -lcrt
/opt/msp430-toolchain/lib/gcc/msp430-none-elf/6.4.0/../../../../msp430-none-elf/bin/ld: cannot find -lnosys
collect2: error: ld returned 1 exit status
When I include the ../../msp430-none-elf/bin/ directory as well I get the following errors:
/opt/msp430-toolchain/lib/gcc/msp430-none-elf/6.4.0/../../../../msp430-none-elf/bin/ld: cannot find crt0.o: No such file or directory
/opt/msp430-toolchain/lib/gcc/msp430-none-elf/6.4.0/../../../../msp430-none-elf/bin/ld: cannot find crtbegin.o: No such file or directory
/opt/msp430-toolchain/lib/gcc/msp430-none-elf/6.4.0/../../../../msp430-none-elf/bin/ld: cannot find -lgcc
/opt/msp430-toolchain/lib/gcc/msp430-none-elf/6.4.0/../../../../msp430-none-elf/bin/ld: cannot find -lmul_none
/opt/msp430-toolchain/lib/gcc/msp430-none-elf/6.4.0/../../../../msp430-none-elf/bin/ld: cannot find -lc
/opt/msp430-toolchain/lib/gcc/msp430-none-elf/6.4.0/../../../../msp430-none-elf/bin/ld: cannot find -lgcc
/opt/msp430-toolchain/lib/gcc/msp430-none-elf/6.4.0/../../../../msp430-none-elf/bin/ld: cannot find -lcrt
/opt/msp430-toolchain/lib/gcc/msp430-none-elf/6.4.0/../../../../msp430-none-elf/bin/ld: cannot find -lnosys
looks like it’s having a hard time finding gcc files??? It seems like there is a config issue going on… any help would be greatly appreciated.
Make sure to also specify the location of the support files for the linker using -L /opt/msp430-toolchain/msp430-none-elf/include/
So full command would be:
/opt/msp430-toolchain/bin/msp430-gcc -mmcu=msp430g2553 -I /opt/msp430-toolchain/msp430-none-elf/include/ -L /opt/msp430-toolchain/msp430-none-elf/include/ main.c
Have a try adding option “-L /opt/msp430-toolchain/msp430-none-elf/include/” to your command line?
August 2019. I have the same error messages on my Debian 10 Buster virtual machine with msp-gcc_v8xx . I wrote to mspgcc mailing list. Answer was “The version of mspgcc available in the Ubuntu packages is quite old and is no longer updated.” So developers recommend me to use MSP430-GCC toolchain distributed by TI. I built MSP430-GCC and program compiled successfully. But mspdebug does not work for my MSP-EXP430fr4133 LaunchPad Development Kit neither with ezfet driver (shows me”hal_proto_execute: HAL exception: 0xffff) nor with tilib driver:
root@msp430:/home/user/msp430/mspdebug/mspdebug-master# ldd /usr/local/bin/libmsp430.so
linux-vdso.so.1 (0x00007ffe7cbef000)
libhidapi-libusb.so.0 => /lib/x86_64-linux-gnu/libhidapi-libusb.so.0 (0x00007f905a62b000)
libboost_filesystem.so.1.56.0 => /lib/libboost_filesystem.so.1.56.0 (0x00007f905a610000)
libboost_date_time.so.1.56.0 => not found
libboost_chrono.so.1.56.0 => not found
libboost_thread.so.1.56.0 => not found
libusb-1.0.so.0 => /usr/local/lib/libusb-1.0.so.0 (0x00007f905a5f5000)
librt.so.1 => /lib/x86_64-linux-gnu/librt.so.1 (0x00007f905a5e9000)
libpthread.so.0 => /lib/x86_64-linux-gnu/libpthread.so.0 (0x00007f905a5c8000)
libstdc++.so.6 => /lib/x86_64-linux-gnu/libstdc++.so.6 (0x00007f905a444000)
libm.so.6 => /lib/x86_64-linux-gnu/libm.so.6 (0x00007f905a2c1000)
libgcc_s.so.1 => /lib/x86_64-linux-gnu/libgcc_s.so.1 (0x00007f905a2a7000)
libc.so.6 => /lib/x86_64-linux-gnu/libc.so.6 (0x00007f905a0e6000)
/lib64/ld-linux-x86-64.so.2 (0x00007f905a9d1000)
libudev.so.1 => /lib/x86_64-linux-gnu/libudev.so.1 (0x00007f905a0be000)
root@msp430:/home/user/msp430/mspdebug/mspdebug-master# ./mspdebug tilib
MSPDebug version 0.25 – debugging tool for MSP430 MCUs
Copyright (C) 2009-2017 Daniel Beer
This is free software; see the source for copying conditions. There is NO
warranty; not even for MERCHANTABILITY or FITNESS FOR A PARTICULAR PURPOSE.
Chip info database from MSP430.dll v3.13.0.601 Copyright (C) 2013 TI, Inc.
tilib_api: can’t find libmsp430.so: libboost_date_time.so.1.56.0: cannot open shared object file: No such file or directory
root@msp430:/home/user/msp430/mspdebug/mspdebug-master# mv /usr/local/bin/libboost_date_time.so.1.56.0 /lib/
root@msp430:/home/user/msp430/mspdebug/mspdebug-master# ldconfig
root@msp430:/home/user/msp430/mspdebug/mspdebug-master# ./mspdebug tilib
MSPDebug version 0.25 – debugging tool for MSP430 MCUs
Copyright (C) 2009-2017 Daniel Beer
This is free software; see the source for copying conditions. There is NO
warranty; not even for MERCHANTABILITY or FITNESS FOR A PARTICULAR PURPOSE.
Chip info database from MSP430.dll v3.13.0.601 Copyright (C) 2013 TI, Inc.
tilib_api: can’t find libmsp430.so: libboost_chrono.so.1.56.0: cannot open shared object file: No such file or directory
root@msp430:/home/user/msp430/mspdebug/mspdebug-master# cp /home/user/msp430/boost_1_56_0/stage/lib/libboost_chrono.so.1.56.0 /lib/
root@msp430:/home/user/msp430/mspdebug/mspdebug-master# ./mspdebug tilib
MSPDebug version 0.25 – debugging tool for MSP430 MCUs
Copyright (C) 2009-2017 Daniel Beer
This is free software; see the source for copying conditions. There is NO
warranty; not even for MERCHANTABILITY or FITNESS FOR A PARTICULAR PURPOSE.
Chip info database from MSP430.dll v3.13.0.601 Copyright (C) 2013 TI, Inc.
tilib_api: can’t find libmsp430.so: libboost_thread.so.1.56.0: cannot open shared object file: No such file or directory
root@msp430:/home/user/msp430/mspdebug/mspdebug-master# find /home/user/msp430/boost_1_56_0/ -iname “libboost_thread.so*”
/home/user/msp430/boost_1_56_0/bin.v2/libs/thread/build/gcc-8/release/threading-multi/libboost_thread.so.1.56.0
/home/user/msp430/boost_1_56_0/stage/lib/libboost_thread.so
/home/user/msp430/boost_1_56_0/stage/lib/libboost_thread.so.1.56.0
root@msp430:/home/user/msp430/mspdebug/mspdebug-master# cp /home/user/msp430/boost_1_56_0/stage/lib/libboost_thread.so.1.56.0 /lib/
root@msp430:/home/user/msp430/mspdebug/mspdebug-master# ldconfig
root@msp430:/home/user/msp430/mspdebug/mspdebug-master# ./mspdebug tilib
MSPDebug version 0.25 – debugging tool for MSP430 MCUs
Copyright (C) 2009-2017 Daniel Beer
This is free software; see the source for copying conditions. There is NO
warranty; not even for MERCHANTABILITY or FITNESS FOR A PARTICULAR PURPOSE.
Chip info database from MSP430.dll v3.13.0.601 Copyright (C) 2013 TI, Inc.
tilib_api: can’t find libmsp430.so: /lib/libboost_filesystem.so.1.56.0: undefined symbol: _ZN5boost6system15system_categoryEv
I was having a lot of trouble compiling the program, but did well by using the following command:
/opt/msp430-toolchain/bin/msp430-gcc -mmcu=msp430g2553 -I /opt/msp430-toolchain/msp430-none-elf/include/ -L /opt/msp430-toolchain/msp430-none-elf/include/ main.c
Then I got a.out, which is great.
One more problem I solved for Mac OS users (I’m running 10.14.5 Mojave at the moment), was when I installed mspdebug using Homebrew, version 0.25 had a bug that didn’t allow me to use the following command:
mspdebug rf2500
because my device wasn’t showing up. If you install mspdebug 0.25 from head, then that error goes away.
To do that, it’s just
brew install mspdebug –HEAD
I’ve been following these tutorials for the newest version of MSP430-GCC tools (msp430-gcc-8.3.0.16-source-full being what I installed).
When I run the command: /opt/msp430-toolchain/bin/msp430-gcc -mmcu=msp430g2553 main.c
I get the following error: /opt/msp430-toolchain/lib/gcc/msp430-none-elf/8.3.0/../../../../msp430-none-elf/bin/ld: cannot represent machine `msp:14′
collect2: error: ld returned 1 exit status
I’ve done a little poking around, and some googling, but not really sure how to fix this. Can you provide any recommendations?
Thanks in advance!
Thanks and a Happy New Year.
Hi!
Firstly, this is a excellent tutorial! For a developer form non-english-speaking nations, the article is very readable! Besides, though I develop on Windows platform, but many things in this tutorial is also useful.
And I meet a question during this lesson. When I use commnd “mspdebug rf2500” to download code to chip, system will report a error “usbutil: unable to find a device matching 0451:f432”. However, if I use command “msdebug tilib” instead of former one, all will be OK. I spend a lot of time on Internet for answer, but nobody knows why it is. Have you ever met this problem?
P.S: The rev. of my LaunchPad is 1.5, too.